A great way to start the year 2017 is with the Microsoft MVP Award for Azure ..
I am very honored and humbled and a big thanks to Lead MVPs and their nominations and for my family and friends who were being so much supportive to achieve this..
A great way to start the year 2017 is with the Microsoft MVP Award for Azure ..
I am very honored and humbled and a big thanks to Lead MVPs and their nominations and for my family and friends who were being so much supportive to achieve this..
This is post aimed to provide introduction to the fundamental building blocks of the Azure Cloud platform Microsoft Azure Resource Manager (ARM) and using Azure Cross Platform CLI tool like PowerShell to manage your Azure resources.
The Azure Resource Manager can be accessed and managed using different methods
ARM natively supports OAuth and Role-Based Access Control (RBAC is by default deny, explicit allow), thus facilitating user access based on pre-defined platform or resource-specific roles.
A lot have changed between Azure Service Management (ASM) and Azure Resource Manager (ARM) and lets quick list the terminologies and details of ARM fundamentals
With all the above review, lets see how we can establish a data connection from on-prem network to Azure Virtual Network by creating a Site2Site IPSec VPN. You can actually choose to deploy Resource Manager Template and PowerShell combination or use the Azure Portal GUI to create the VPN tunnel.
Pre-Requisites
Upon completion of this configuration you network should look something similar to below schematic

Azure Configuration
The subsection will describe the various configuration process to create the Site2Site Azure end configuration
Step 1 – Azure Virtual Network
Navigate from +New -> Networking -> and select Virtual Network to create a ARM virtual network to facilitate communications between Azure Networks to On-premise data networks.
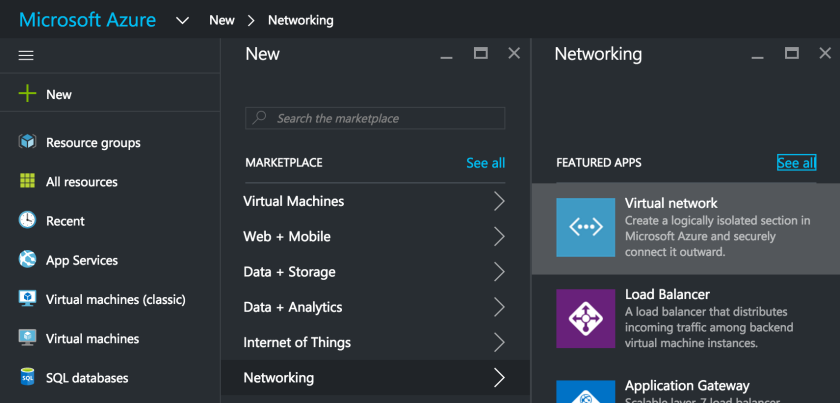
Make sure you select the deployment model as Resource Manager in the new blade and click Create
Fill in the needed information on the newly opened Blade for the new Virtual Network
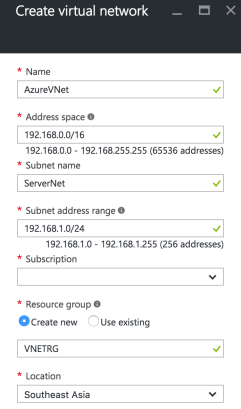
Most Importantly select an Address Space that doesn’t overlap with your on-premises IP Network address. Also for the sake of simplicity of subneting, we choose 192.168.0.0/16 as Address Space and 192.168.1.0/24 for ServerNet and 192.168.0.0/24 for GatewaySubnet. Click on the blue Create button to start the Virtual Network creation process.
Step 2 – Subnets Configuration
Upon successful creation of Virtual Network we need to configure the required subnets, particularly the GatewaySubnet by Navigating to Virtual Networks -> AzureVNet -> Subnets -> and click on +GatewaySubnet

Step 3 – Local Subnet Gateway
Step 1 & 2 confirms the creation of Virtual Network named AzureVNet. Now we proceed to create the Local Subnet Gateway which essentially takes care of network routing between on-premise network and Azure Virtual Network.
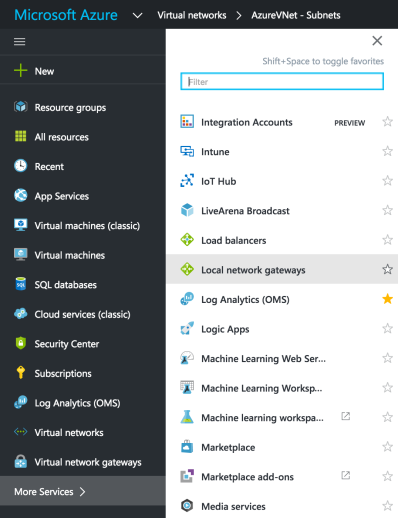
Choose the Local Network Gateways and in the new blade fill in the needed details including the on-premise gateway public IP address and data network address space. Please replace IP address 11.22.33.44 with your actual on-premise network gateway’s public IP address.

Until now we have defined the network and subnets where new virtual machines can be added. Next we need to add Virtual Network Gateway
Step 4 – Virtual Network Gateway
Now we create the Virtual Network Gateway by navigating +New -> Networking -> Virtual Network Gateway and fill in the needed details on the newly opened blade and click the blue Create button.

after about 15-25 mins the Virtual Network Gateway will be created and you can see the assigned Public IP address. 
Step 5 – Connection
Now we need to complete the final step in the Azure end configuration of creating the Connection to on-premise network gateway. Navigate from Local Gateway Networks -> AzureLocalNetGW -> Connections -> Add

In the next configuration blade populate the needed information. Dont forget to create a complex Shared Key (PSK) that will be used in the IPSec VPN Phase 1 negotiation with the on-premises. Populate the Virtual Network Gateway and Local Network Gateway created in the previous steps and complete the configuration.

On-Prem Firewall Configuration
Based on the type of on-premise Network gateway device type, you can configure matching IPSec VPN Phase 1 and Phase 2 parameters. I am listing most popular configuration options which could vary for different devices. Please consult the network gateway device technical documentation for more details.
Phase 1 Proposal Options
IP Version 4, IKE Version 2, Diffie-Hellman Group 2, Authentication – PreShare Key (PSK)
Encryption – AES128 / SHA256, AES256 / SHA256, AES128 / SHA1, AES256 / SHA1
Phase 2 Proposal Options
Encryption – AES128 / SHA256, AES256 / SHA256, AES128 / SHA1, AES256 / SHA1
In this series of post we primarily focus on the enhancements and new feature sets in Windows Server 2016. In Part 1 plan is to get introduced to various versions and some of the important features.
Windows Server 2016 Versions
Enhanced Security
There has been significant improvements or rather enhancements to the Windows 2016 server platform to improve secure computing environment and reduction of attack surfaces for improved security.
Computing
With Windows Server 2016 you can run datacenter with a highly automated, resilient and Virtualized server operating system.
Networking
The Windows Server 2016 networking is built with the same set of feature from Microsoft Azure datacenters providing the much higher agility and availability to your datacenters.
Application Platforms
Windows Server 2016 facilitates various ways to deploy and run your applications across on-premises or on Microsoft Azure
In the next part level explore more remaining features and installation guides to make use of the most powerful Server OS that Microsoft built, Windows Server 2016.
In continuation to PowerShell on Mac OSX let see how we can connect to Azure from OSX CLI. Firstly you need to download the Azure Command Line Interface (Azure Cross Platform CLI) from here (direct download link)
Double click the downloaded file which will launch the package installer

Follow the on screen instruction and complete the installation of Azure CLI

Upon completion bring up the Terminal App on your OSX and issue azure to invoke the Azure CLI access to your Azure subscription.

After installing the Azure CLI on your OSX machine, lets connect to your existing Azure subscription, from you Terminal App issue azure login which will provide an URL and Code to get authentication your Azure CLI session
 In this case you lets redirect the browser to https://aka.ms/devicelogin and enter the code HTFZEF4GX and click “Continue“

Follow the on screen instructions to provide credentials and complete the authentication

Upon successful authentication a confirmation message will be displayed
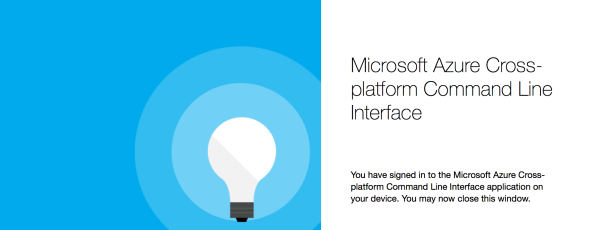
You can see all your Azure Subscriptions in the Terminal App window

To install Azure CLI on any Linux distribution you need npm (default package manager) and latest Node.js (open source, cross platform JavaScript runtime), you can install the Azure CLI (packaged and published by npmjs.com)
npm install -g azure-cli
If you prefer to download Linux tar file by yourself and install you can use the following command
npm install -g <path to tar file>
Assuming your computer is already configured as Docker host and you can run the Azure CLI in a Container
docker run -it microsoft/azure-cli
In yesteryears Microsoft was primarily focused on .NET to PowerShell which was only available in Windows. But with the recent shift in Microsoft towards customer preferences .NET was ported to Linux (and variants including OSX) and by extension run PowerShell on Linux and OSX.
Most of us are already familiar enough with the PowerShell on Windows. Lets see how to run and make use of PowerShell from Mac OSX and Linux
Mac OSX
Though there is no minimum requirement for the OSX version, its recommended to have OSX 10.10 (Yosemite) and above.
First and foremost download the PowerShell package from the Official distribution page (https://github.com/PowerShell/PowerShell/releases), powershell-6.0.0-alpha.9.pkg in our case

To install PowerShell on you mac, double click the downloaded .pkg file which will launch the package installer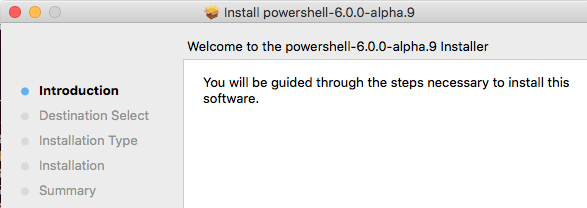
Follow the on screen instructions to complete the installation

Now open the Terminal App and issue the command powershell to invoke the PowerShell

Get the PowerShell package for Linux from the Official distribution page (https://github.com/PowerShell/PowerShell/releases), .deb or .rpm in this case. Issue to following command and install the dependency
sudo apt-get install libunwind8 libicu55
After successful install, issue the below command to get the PowerShell installed on your Linux host
sudo dpkg -i /path to powershell.deb
So we installed PowerShell on OSX or Linux, whats next?
Structured Command (Cmdlets)
PowerShell supports commands called as Cmdlets (pronounced as Command-Lets), for example Get-Process -Name L* will give details about the running processing that starts with letter L

Some cool things, PowerShell natively supports all .NET methods right from your Mac OSX or Linux. You can count the length of a string by using same .NET method, also use it as calculator

You can discover all the PowerShell commands using a particular Cmdlet Get-Command, below example Get-Command *process* will give information not only on Cmdlet but also any Functions, Methods that contains the word process

Piping a Get-Member Cmdlet will provide the list of Properties and Methods of the Object

PasswordNeverExpires
Sometimes as an Office 365 admin you may be in a situation where you want to set password not to expire for a Office 365 account. The below steps will guide you to set the password not to expire for individual accounts..
Before connecting to the your Office 365 organization make sure the Azure Active Directory Module for Windows PowerShell is already installed and run the following PowrShell Cmdlets
Connect to Msol-Service and key in your Office 365 Tenant admin credentials.

Upon successful authentication run the following command
To set the Password Never Expires setting
Set-MsolUser -UserPrincipialName <useraccount@contoso.com> -PasswordNeverExpires $true
To remove the Password Never Expires setting
Set-MsolUser -UserPrincipialName <useraccount@contoso.com> -PasswordNeverExpires $false
To list all users whose password was set to never expire
Get-MsolUser | Select UserPrincipialName, PasswordNeverExpires
Important Notes
